I have to agree with Mad Maxwell and Mad Dan on this one Humvee:
To get an idea of what going on at the Tranny end, have a look while someone shifts for you.......
The job will be "Zen Like" simple once you have all the pieces in your grasp, a cable linkage is the way to go. You may have to fabricate a bracket or 2, or they may even have something suitable in the cable kit. It really is as simple as the lever coming off the shifter linkage moves the lever on the tranny. You may have a little adjustment to do in relation to the shift stops changing from a column shift to the new setup, but it might just be bolt and play.
I love the Gas filler!!!! I CANT WAIT to see your steering linkage!
Building the Humungus machine
-
MFP1

- Posts: 990
- Joined: Mon May 13, 2002 1:42 am
- Location: International Hero & Fantasy Car Ranch, Seattle
- Contact:
Re: Building the Humungus machine
"We'll see you on the road scag, We'll see you like we saw the nightrider!!!", "Perhaps its a result of anxiety...." MFP1

Re: Building the Humungus machine
Morse cable shifters are f'n expensive. But if you've got any kind of Off-Road/Buggy/Boat shop close in your town, go have a look-see and see if they'll humor you enough to look a cable shifter over so you can see how they work. Or you can see how feasible extending all the levers and such.
"In order to create, you have to destroy"
https://www.facebook.com/ZaranaX
http://wastelandweekend.com/
https://www.facebook.com/ZaranaX
http://wastelandweekend.com/
-
Mad Maxwell
- Posts: 259
- Joined: Mon Jan 24, 2000 8:02 am
- Location: RTP, North Carolina, USA
Re: Building the Humungus machine
Those Ford shifter are all over ebay. The going rate seems to be around $75.
http://cgi.ebay.com/ebaymotors/1969-70- ... ccessories
Shift cables are around $25:
http://cgi.ebay.com/ebaymotors/Parts-Ac ... 240%3A1318
$100 or so is not too bad...
http://cgi.ebay.com/ebaymotors/1969-70- ... ccessories
Shift cables are around $25:
http://cgi.ebay.com/ebaymotors/Parts-Ac ... 240%3A1318
$100 or so is not too bad...
Evan "Mad" Maxwell
"Oh my God, what happened?"
"I don't know man I just got here myself."
"Oh my God, what happened?"
"I don't know man I just got here myself."

Re: Building the Humungus machine
Hey Humvee,
Hope you can post some video footage of your humungus machine when its all done,looking good mate.
Simon
Hope you can post some video footage of your humungus machine when its all done,looking good mate.
Simon
The chain in those handcuffs is high-tensile steel, it'll take you ten minutes to hack through it with this, now if your lucky ? you can hack through your ankle in five minutes. Go !
Re: Building the Humungus machine
I have one of those shofters that I'm donating to humvee but it neds the handle....however if he can get one from ebay for less than $20 complete....... in the meantime if someone has a handle they could donate it would help keep costs down for him


Re: Building the Humungus machine
I've got a Hurst T handle with trigger pull that I will gladly donate if it'll work for the look.
-
HUMVEE Driver

- Posts: 1316
- Joined: Sun Oct 17, 1999 4:18 am
- Location: Detroit area, USA
- Contact:
Re: Building the Humungus machine
Thanks to everyone for all their help and input! It seems that moving the shifter won't be too hard after all. I'm probably going to go with a cable when I'm ready to put it in... which should be pretty soon...
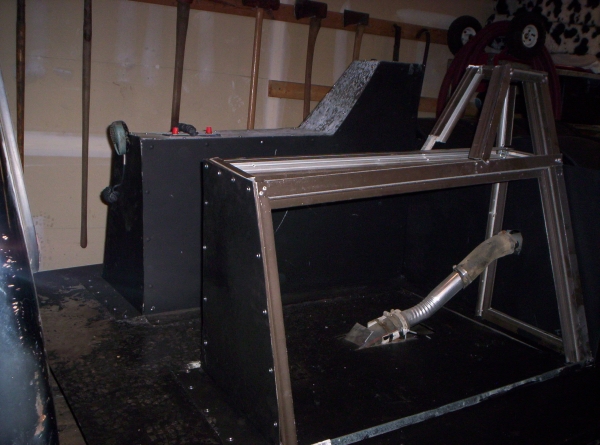
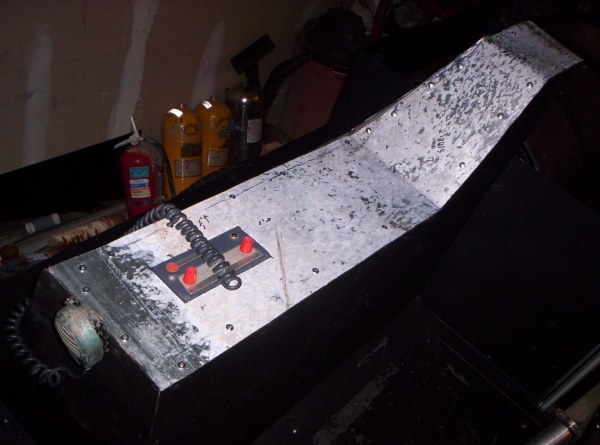
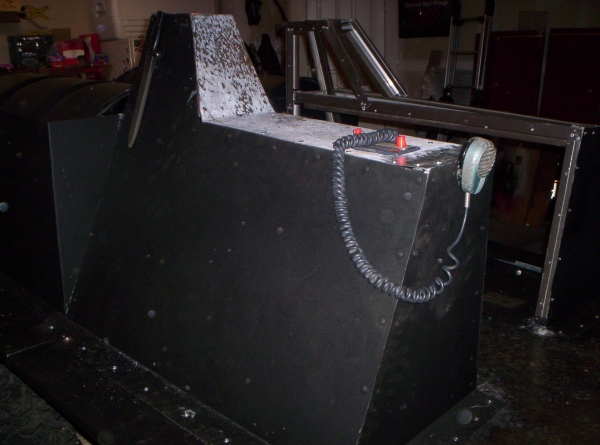
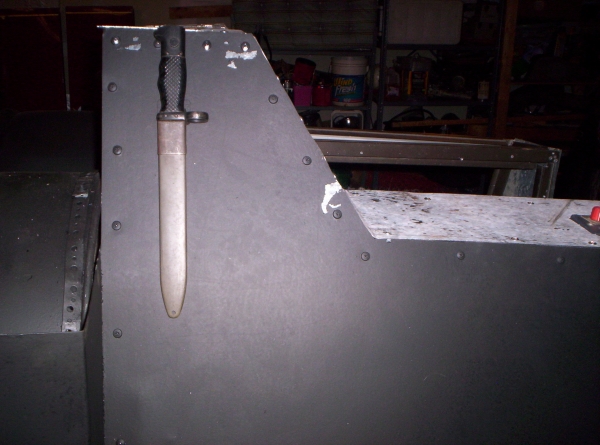
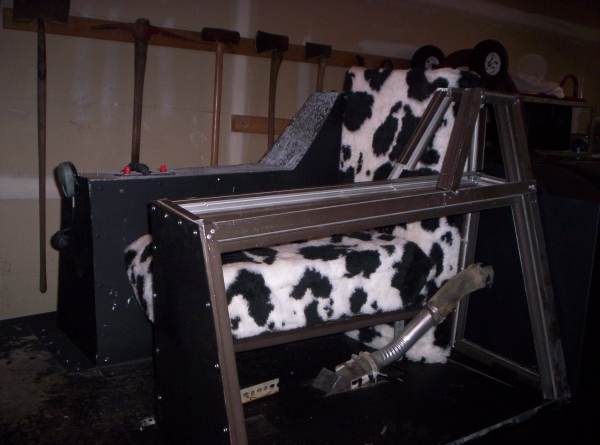
Today I did some more work on the seat. The right hand side is just about finished except for the painting. I combined my PA system into the arm rest; just like Humungus, and I bolted on one of the knives I bought. I have the left side frame in place, but I am leaving most of the sheet metal off so I have access when I do the shifter. I also made the actual seat and put the custom foam cushions on with the 'cow hide' seat covers.

HUMVEE Driver
Today I did some more work on the seat. The right hand side is just about finished except for the painting. I combined my PA system into the arm rest; just like Humungus, and I bolted on one of the knives I bought. I have the left side frame in place, but I am leaving most of the sheet metal off so I have access when I do the shifter. I also made the actual seat and put the custom foam cushions on with the 'cow hide' seat covers.
HUMVEE Driver
"I'll see you on the road!"
http://www.madmaxmodels.com
http://www.madmaxmodels.com
-
HUMVEE Driver
- Posts: 1316
- Joined: Sun Oct 17, 1999 4:18 am
- Location: Detroit area, USA
- Contact:
Re: Building the Humungus machine
I finally got the rear piece back and bolted on. I made the mistake of driving around in the cold, and now I have some rust spots to take care of. No big deal. The two brackets on each side are there to hold the tail lights. I can just slide them down on there when I want to drive, then take them off and hang them under the rear for display. I've been cutting the pieces for the rear spoiler. I can weld them pretty easy, but the only hard part will be bending the curves in the horizontal piece.
Soon I'll be taking the cab apart. That will be the point of no return. I'll have to finish this beast in my garage, because obviously I won't be able to drive it to a repair place. Once I get everything out of the way, moving the shifter should work ok. I just need to measure and buy a shifter cable of the right length. I have a good idea of what kinds of angles I can put into the steering column, and I hear they make kits for relocating the brake master cylinder. Slowly but surely...
HUMVEE Driver
"I'll see you on the road!"
http://www.madmaxmodels.com
http://www.madmaxmodels.com
-
MFP1
- Posts: 990
- Joined: Mon May 13, 2002 1:42 am
- Location: International Hero & Fantasy Car Ranch, Seattle
- Contact:
Re: Building the Humungus machine
Dang! You are really coming along...................... And I was sweating chopping the top off of my 68 F100...........
Humvee you are an INSPIRATION!!! Keep up the AWESOME work!
Humvee you are an INSPIRATION!!! Keep up the AWESOME work!
"We'll see you on the road scag, We'll see you like we saw the nightrider!!!", "Perhaps its a result of anxiety...." MFP1
-
HUMVEE Driver
- Posts: 1316
- Joined: Sun Oct 17, 1999 4:18 am
- Location: Detroit area, USA
- Contact:
Re: Building the Humungus machine
Thanks to everyone who has offered to help out with the shifter, but I found one that is perfect... for FREE! I went to a junk yard to sell some of the parts that I've taken off the truck, and they had one there, just sitting around! So I traded the rear bumper of the truck for it. Awesome. The only 'thing' about it is that the little button you press when you shift is on the left side of the 'T'. When I mount the shifter, (to the driver's left) that button will face to the left. So I can't use my thumb to press it in, and there is no way I can do it with my pinky finger. Maybe I can just flip the shifter? Will the linkage to the trans still work if it’s reversed that way? If not, I'm in for some awkward shifting.
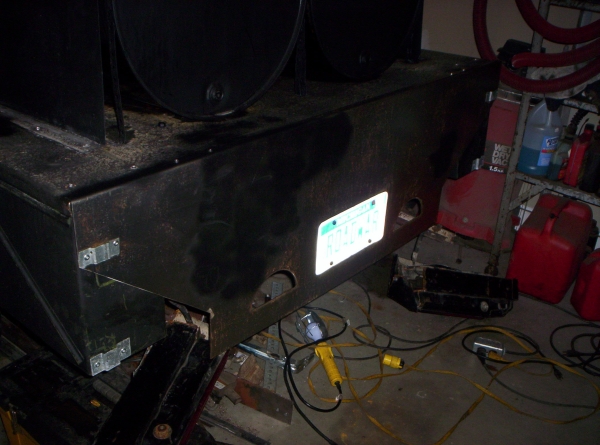
I'm trying to do as much as I can to the rear before I take the cab apart. I've been building the spoiler, but if I put it on there it will be too tall to make it out of my garage! So I'll have to build it separate and then put it on. Also in the rear, there are two horizontal squared tubes just inside each spoiler support. At the end of each of those is a (about) 8" piece of vertical pipe. They wrap the fuel nozzle and hose around those. You can see them here:
And here:

So I made them up today. I also have parts to make up the replica fuel pumps on either side. I looked everywhere for some real ones but they are impossible to find, so fakes will have to do.

Here are the removable tail lights; that can be positioned where they are now, or stowed under the rear.
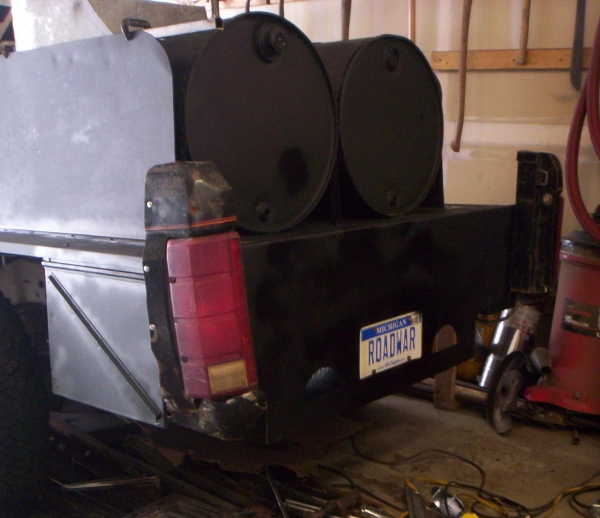
Lastly, I realized that the six nitro bottles are actually a little smaller than the ones I made up. On a closer look, they appear to be the same size as these 12" propane bottle. I had three lying around, and I found three more very cheap at a hardware store. I'll have them painted up soon.
HUMVEE Driver
I'm trying to do as much as I can to the rear before I take the cab apart. I've been building the spoiler, but if I put it on there it will be too tall to make it out of my garage! So I'll have to build it separate and then put it on. Also in the rear, there are two horizontal squared tubes just inside each spoiler support. At the end of each of those is a (about) 8" piece of vertical pipe. They wrap the fuel nozzle and hose around those. You can see them here:
And here:
So I made them up today. I also have parts to make up the replica fuel pumps on either side. I looked everywhere for some real ones but they are impossible to find, so fakes will have to do.
Here are the removable tail lights; that can be positioned where they are now, or stowed under the rear.
Lastly, I realized that the six nitro bottles are actually a little smaller than the ones I made up. On a closer look, they appear to be the same size as these 12" propane bottle. I had three lying around, and I found three more very cheap at a hardware store. I'll have them painted up soon.
HUMVEE Driver
"I'll see you on the road!"
http://www.madmaxmodels.com
http://www.madmaxmodels.com